File Preparation for Printing
- By Stevenson
- 08 Oct, 2020

Accepted File Resolution
Resolution also known as DPI (Dots Per Inch) or PPI (Pixels Per Inch) can be described as the number of dots that fit horizontally and vertically into a one-inch space. In general, the more dots per inch it have, resulting sharper image.
For an image to print properly, the image resolution must be at least 300 dots per inch (DPI) at the final output size.

Check Images with Photoshop
Check your file in Photoshop that has the proper resolution for printing, click on Image>Image Size. View the resolution section. Set the resolution to 300 dpi.
Check Images with Acrobat Reader
Check your file in Acrobat Reader that has the proper resolution for printing, set your view to 300%. Your artwork should not appear pixelated beyond this point.
If your artwork appears pixelated beyond the 300% view in Acrobat, then this indicated that your file is low resolution.
DO NOT ENLARGE a 72 dpi file in your 300 dpi document.
A common misconception is that you can convert a file from 72 dpi to 300 dpi. If your image is small at 72 dpi, the image will actually be smaller when importing it to a 300 dpi document. This is not the same for a large file size at 72 dpi. Example, if your file is 25 inches by 35 inches at 72 dpi, then the file is large enough to import into a 300 dpi document.
DO NOT RESAMPLE THE RESOLUTION in Photoshop.
Here is another misconception that you can adjust the resolution from 72 dpi to 300 dpi in Photoshop by changing the current 72 dpi to 300 dpi. This is incorrect. Doing it will eventually make your file pixelated.
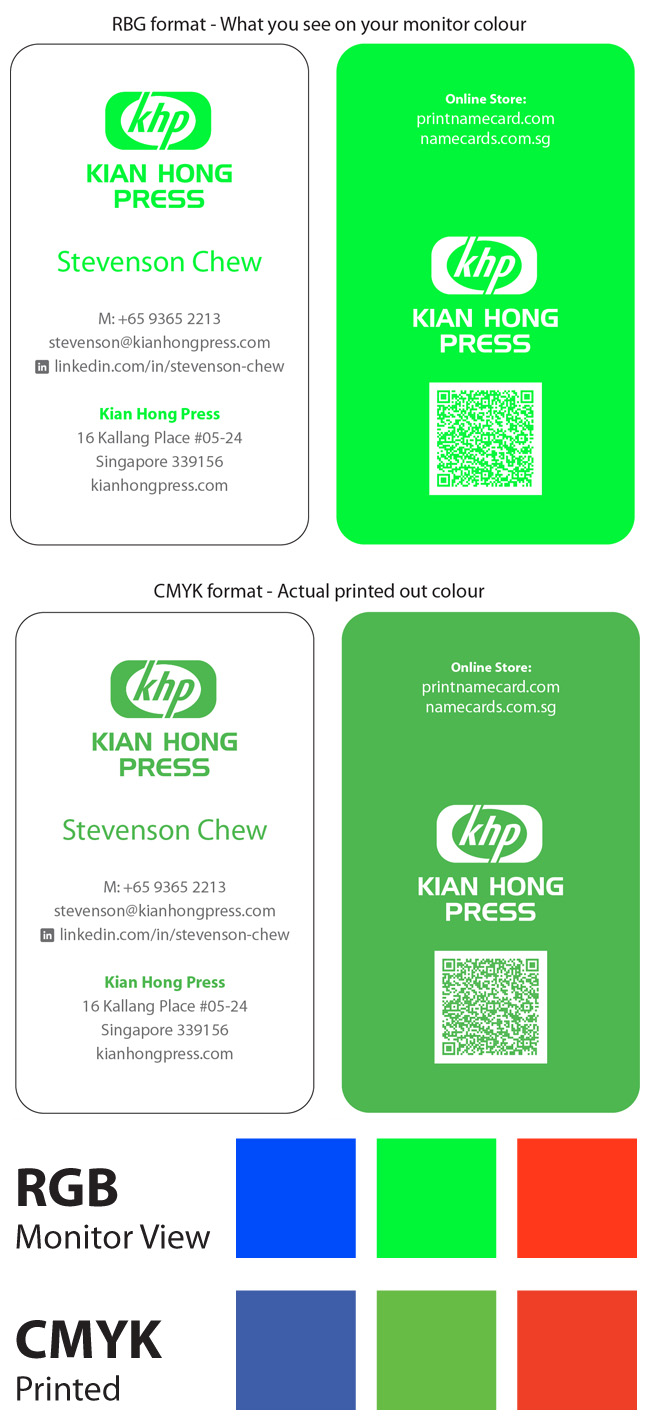
Accepted Colour Mode
Colour mode must be in CMYK to be a print ready file. If file(s) are submitted using any other colour mode, such as RGB or Pantone, the file(s) will be converted to CMYK during prepress. Conversion from one color standard to another may result in a colours shift or colours dropping out.
Name Card Artwork, Safety, Bleeds & Cutting Guidelines
If you set your artwork up correctly, you will be happy with the finished name cards. We have set everything in millimeters because of their ease of explaining. Example the finished card size is 89mm x 54mm (3.50″ x 2.12 inches).
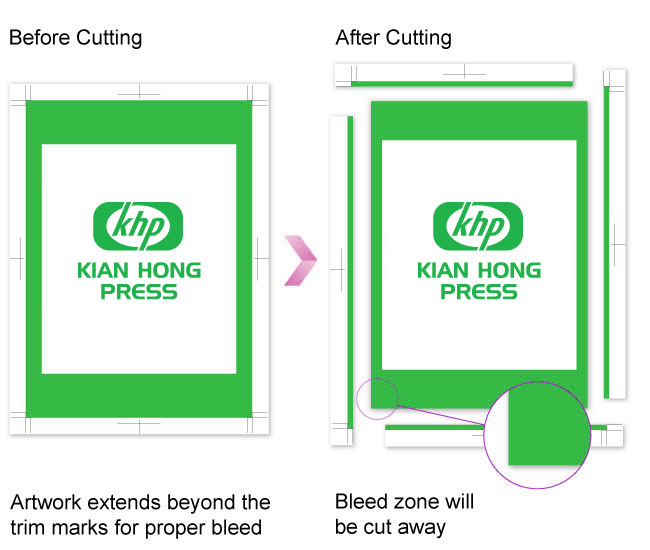
If you are new to printing then this page is very important for you to learn about ‘bleed’. If you have a photo or image covering the entire background of your card, then you must pay very particular attention to how your artwork is set up to ensure that you do not get white lines around the edges of your card.
If you want something to go to the edge of your card, like a photo, a line or a logo perhaps, then you must run it over the edge of the card by an EXTRA 3mm (0.13″). This is called bleed. This 3mm (0.13″) is trimmed off after printing ensuring that you get your image or colour all the way to the edge of your card.
If you want a name card size 89mm x 54mm, your artwork must be 92mm x 57mm in dimensions. This includes 3mm (0.13″) bleed all the way around which will be trimmed off after printing. Your name cards will be delivered to you 89mm x 54mm in size.
Once your artwork is uploaded to our website, it must be positioned as mentioned in order to bleed correctly. This is pre setup for you on most templates already.
The below diagram illustrates how you should make your artwork 3mm (0.13″) bigger all the way around to allow for bleed.
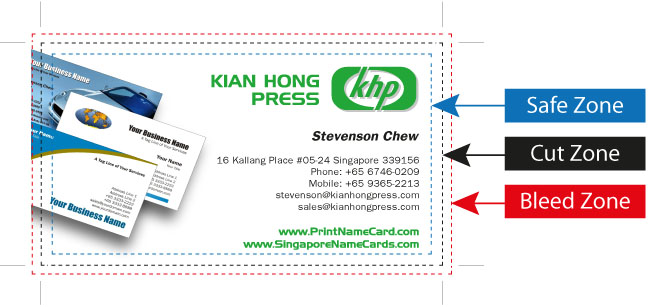
Cut Zone (Trim Marks)
The product will be cut on the trim mark, however the cut may shift up to 0.13″ of an inch in any direction.
Bleed Zone (Full Bleed)
If you wish to have colored backgrounds or images extend to the edge of the product they must past the trim marks to the full bleed margin. If they do not extend to the full bleed margin you most will end up with white strips along the edge of the product due to cutting.
Safe Zone
The text or elements you want not to be trimmed off must be placed within the safe zone. If they are placed next to the trim mark and the cutting is off but within tolerance, the text will be cut off.
Fonts and Transparency Problems
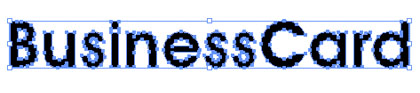
Fonts, transparencies and other effects used in vector format softwares (Illustrator, InDesign and Photoshop) layer must be flattened and the fonts outlined. Not flattening transparencies or outlining fonts may result in some text or graphics dropping out from your artwork. When digital art is supplied with missing fonts, we cannot process your job in production.
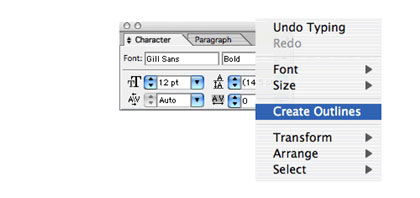
Convert all text to outlines. Both Adobe Illustrator, InDesign, and CorelDraw can accomplish this task. See the following procedure to convert a font into outlines using Adobe Illustrator.
Make sure to check
- “Convert All text to Outlines”
- “Convert All Strokes to Outlines”
- “Preserve Alpha Transparency”
- “Preserve Overprints and Source Color”
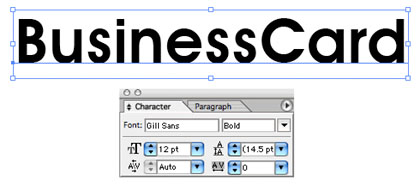
To convert this text to outlines, simply pull down the contextual menu (Right mouse click on the PC, and Control click on the Mac), and select “Convert to Outlines”.
The text has now been converted to a series of outlines and fills. The reference to the font Gill Sans is no longer present, and it is unnecessary for anyone to have access to the original font.